Installing your KAN seat
Installing your Kandre toilet seat should be easy and smooth. When fitted correctly, the seat should sit firmly on the porcelain and not slip sideways.
Exclusive
Installation of toilet seats in the Exclusive series with quick release and soft close. See film below.
When installing a toilet seat that is not accessible from below, a top mounting kit is required, which allows all installation to be done from above.
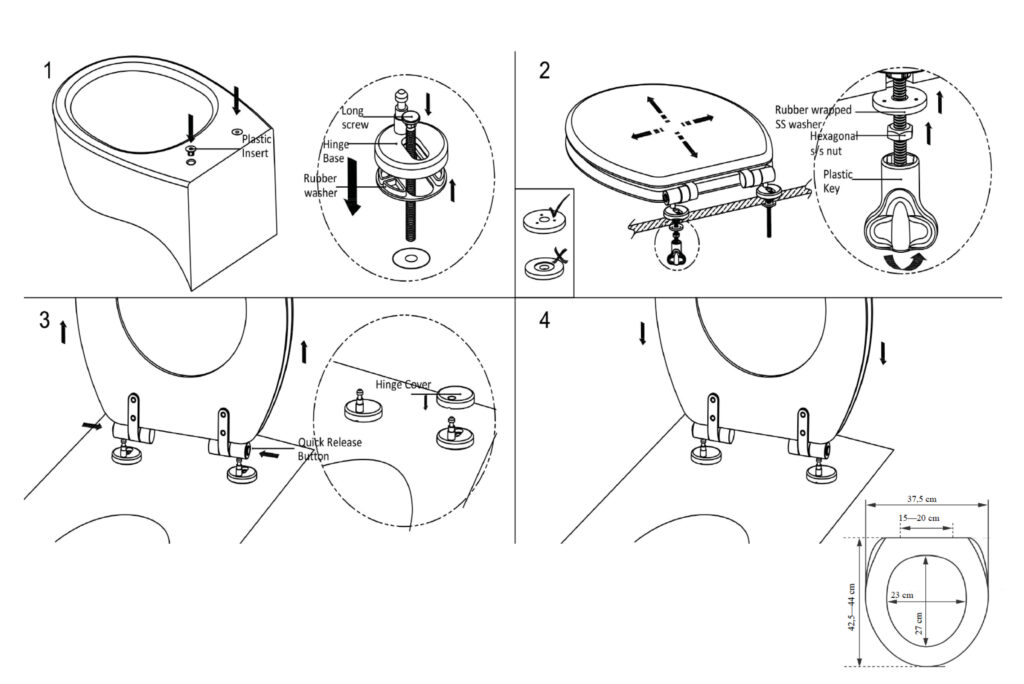
Classic
Installation of toilet seats in the Classic series.
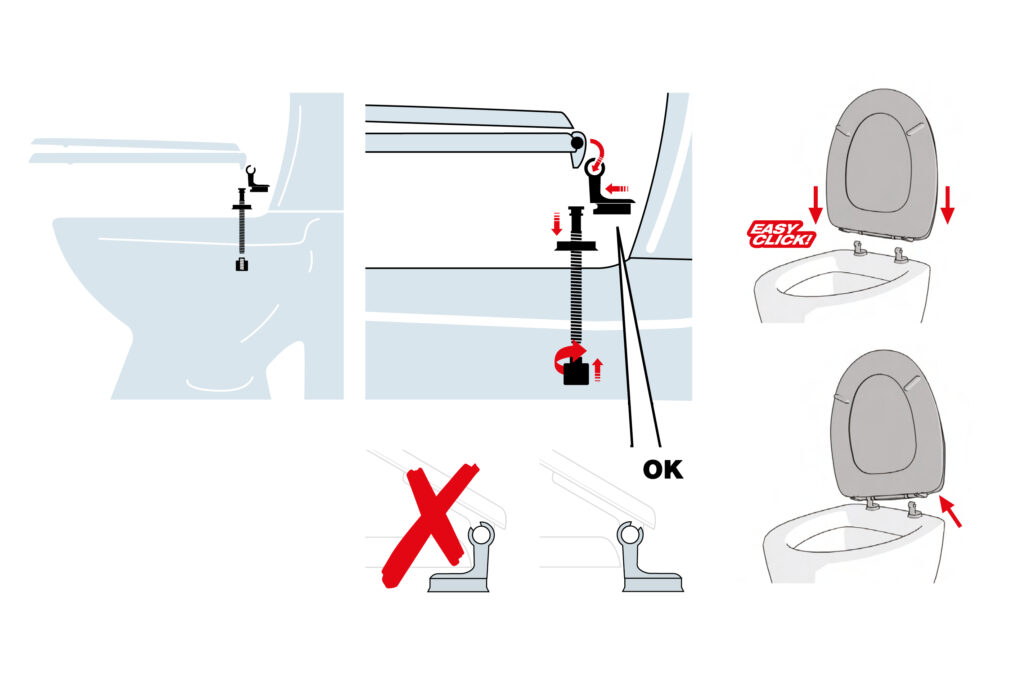
Kan Safe
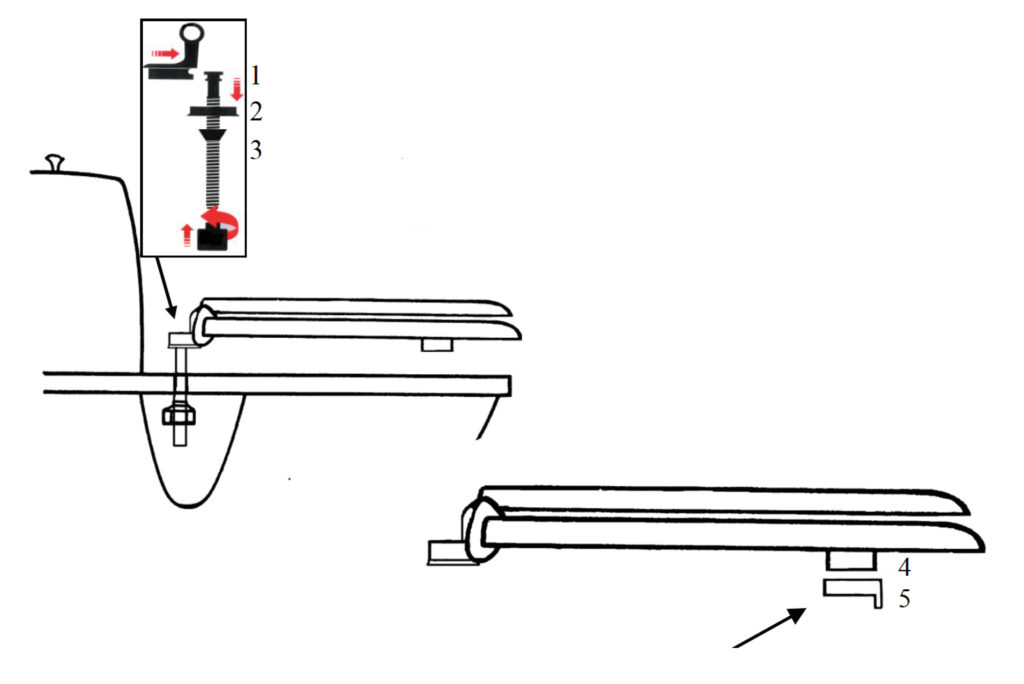
Kan Safe is a toilet seat with extra strong attachment details, the ring has large anchorage buffers with support rings, which makes the seat sit very stable on the toilet seat. The brackets and support rings are adjustable both laterally and depthwise.
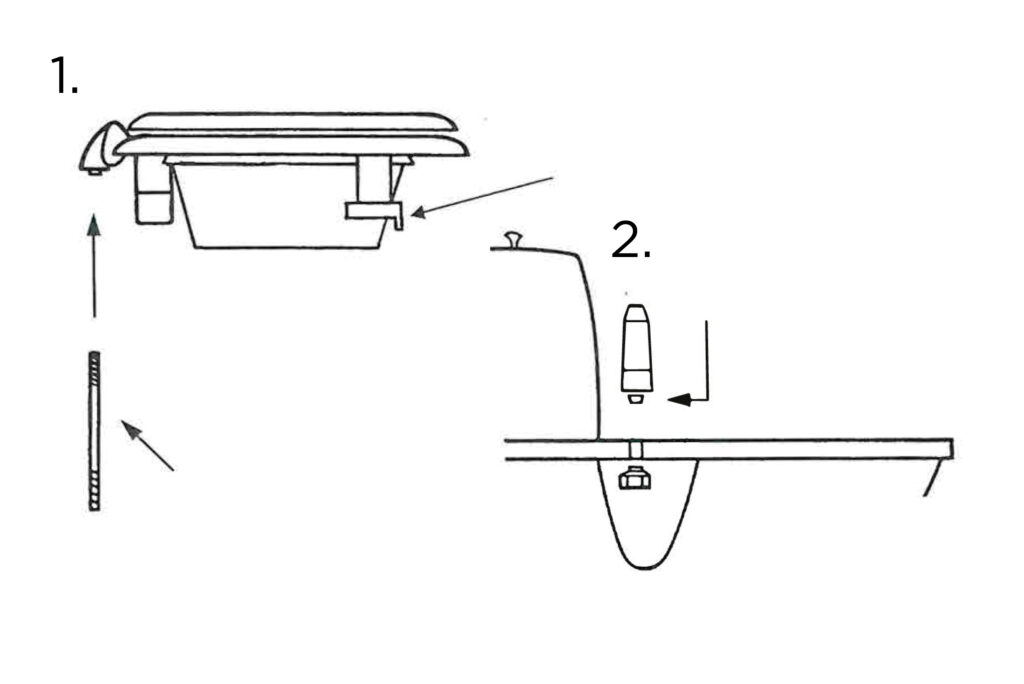
1. Fit the two square-headed screws to the brackets on the toilet seat.
2. Press the grey oval sealing rings onto the brackets.
3. Press the cones up against the sealing rings. NOTE! The cones should ONLY be used if the toilet seat fixing holes are larger than 18mm.
4. Then carefully insert the seat with screws into the toilet seat fixing holes.
5. Loosely screw on the nuts. Then unfold the cover ONLY. NOTE! The seat can be locked in the wrong position if both the cover and the ring are unfolded before the seat has been adjusted sideways.
6. Adjust the seat both sideways and downwards. Check that the lid is now in the raised position against the water container.
7. Tighten the nuts securely.
8. Fold the ring upwards and it will automatically lock sideways.
9. Fit the support rings (5) by loosely fitting them onto the grey buffers (4). Then turn the support rings towards the edge of the WC chair. NOTE! The pointed part of the support ring should point downwards.
10. Then push the seat down. The support ring is then pressed down and the seat is fixed against the edge of the WC chair.
Kan Public
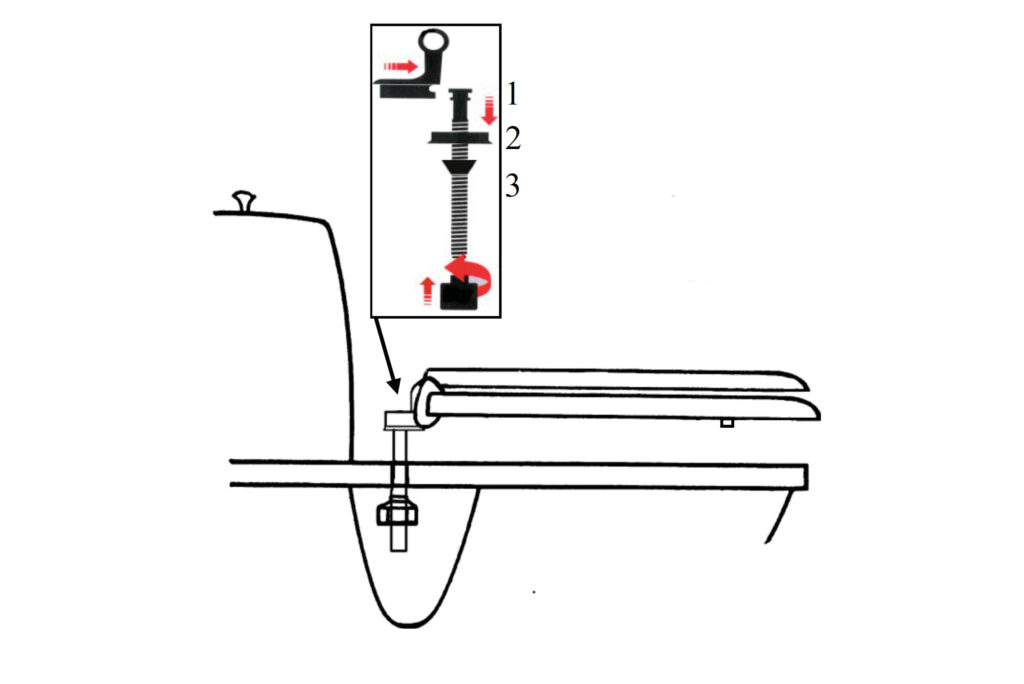
Kan Public is a toilet seat with extra strong attachments that make the seat very stable on the toilet seat. The brackets are adjustable both laterally and depthwise.
1. Fit the two square-headed screws to the brackets on the toilet seat.
2. Press the grey oval sealing rings onto the brackets.
3. Press the cones up against the sealing rings. NOTE! The cones should ONLY be used if the toilet seat fixing holes are larger than 18mm.
4. Then carefully insert the seat with screws into the toilet seat fixing holes.
5. Loosely screw on the nuts.
Then unfold the cover ONLY. NOTE! The seat can be locked in the wrong position if both the cover and the ring are unfolded before the seat has been adjusted sideways.
6. Adjust the seat both sideways and downwards. Check that the lid now remains against the water container in the raised position.
7. Tighten the nuts securely.
8. Fold the ring upwards and it will automatically lock sideways.
Increase
1. The support ring is rotatable around the leg, and should be turned in towards the WC edge, for maximum stability. Screw the stud firmly into the seat mount.
2. The bushing should not be used if the hole in the porcelain is less than 16 mm.
Cleaning: use a soft cloth, warm water and a few drops of mild detergent.
